How to use the backoffice of the leadmanager
The Procedure:
- As a user of the Lead Manager, you will receive a login from the event organizer for the Lead Manager application.
- With access to this application, you can: scan leads, export leads, edit leads, configure additional questions, and link the Lead Manager to other software packages.
- To use this application, you do not need to download any additional software or rent/purchase specialized hardware.
- You can start using the Lead Manager immediately or go through configuration steps to streamline the process.
- After scanning a QR code, you will see the standard information of the person. After that, you will optionally see the additional questions (only if you have configured them).
- Every lead is saved automatically.
- You can export all your leads during or after the event.
Step by step:
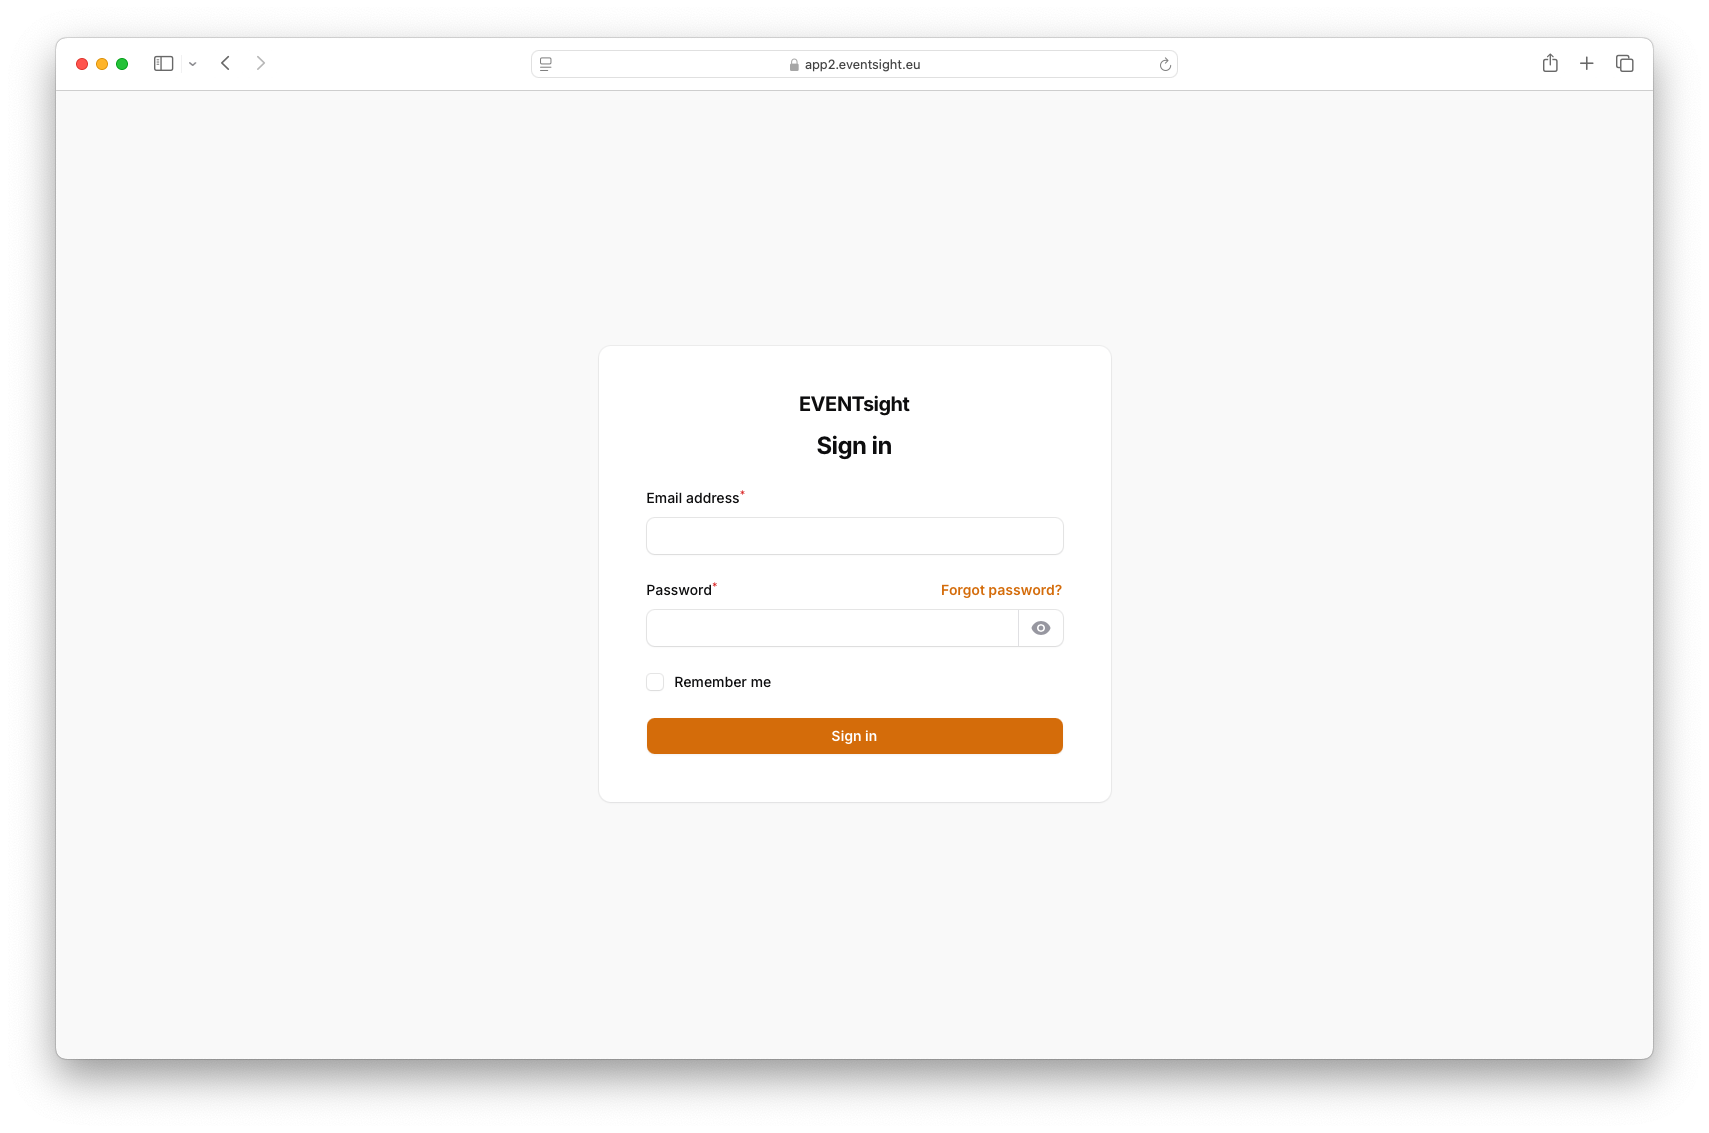
1. Open a web browser such as Chrome, Safari, Firefox, or another of your choice. Log in with your credentials.
2. If you are logged in on your smartphone, you are immediately ready to start scanning. Press "Scanner" to begin. For all other options, click "Go to dashboard".
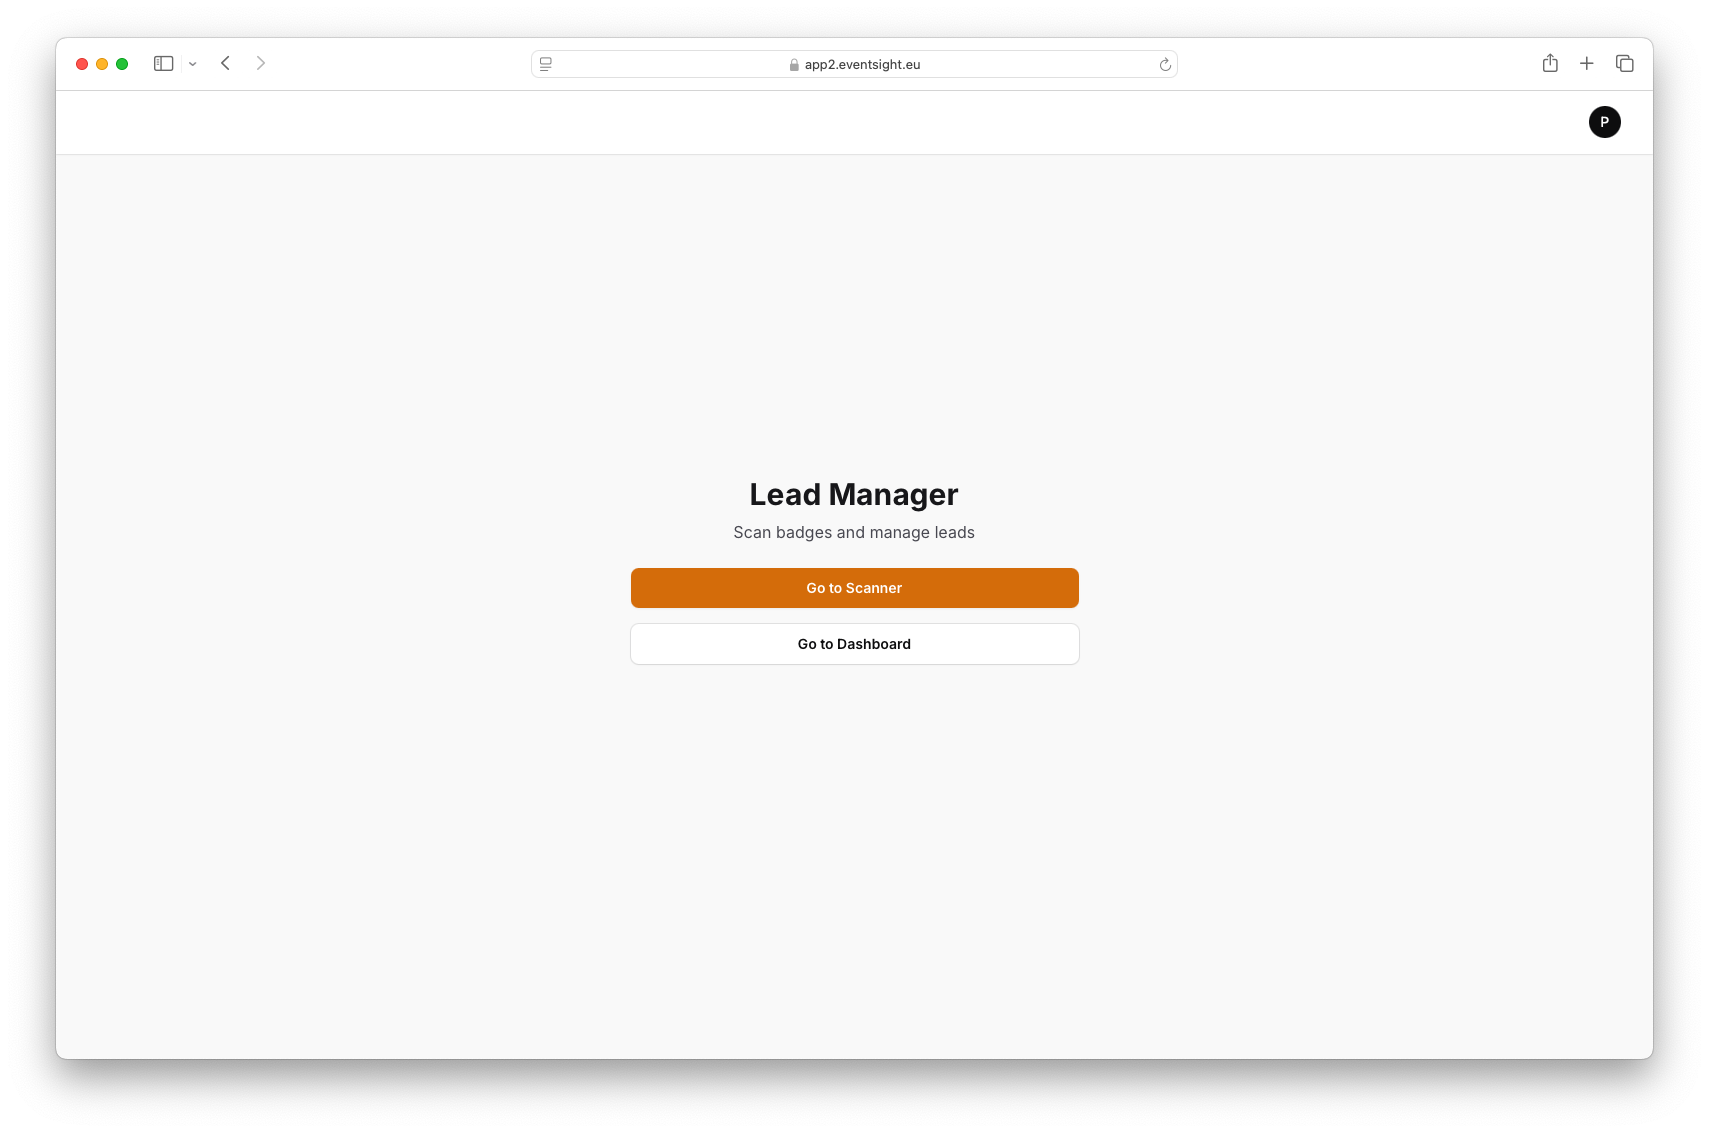
Tip: If you do not need to scan, we recommend logging in from a tablet or computer.
3. You are now in the back office. The first screen you will see is the dashboard, which gives an overview of your most recent leads.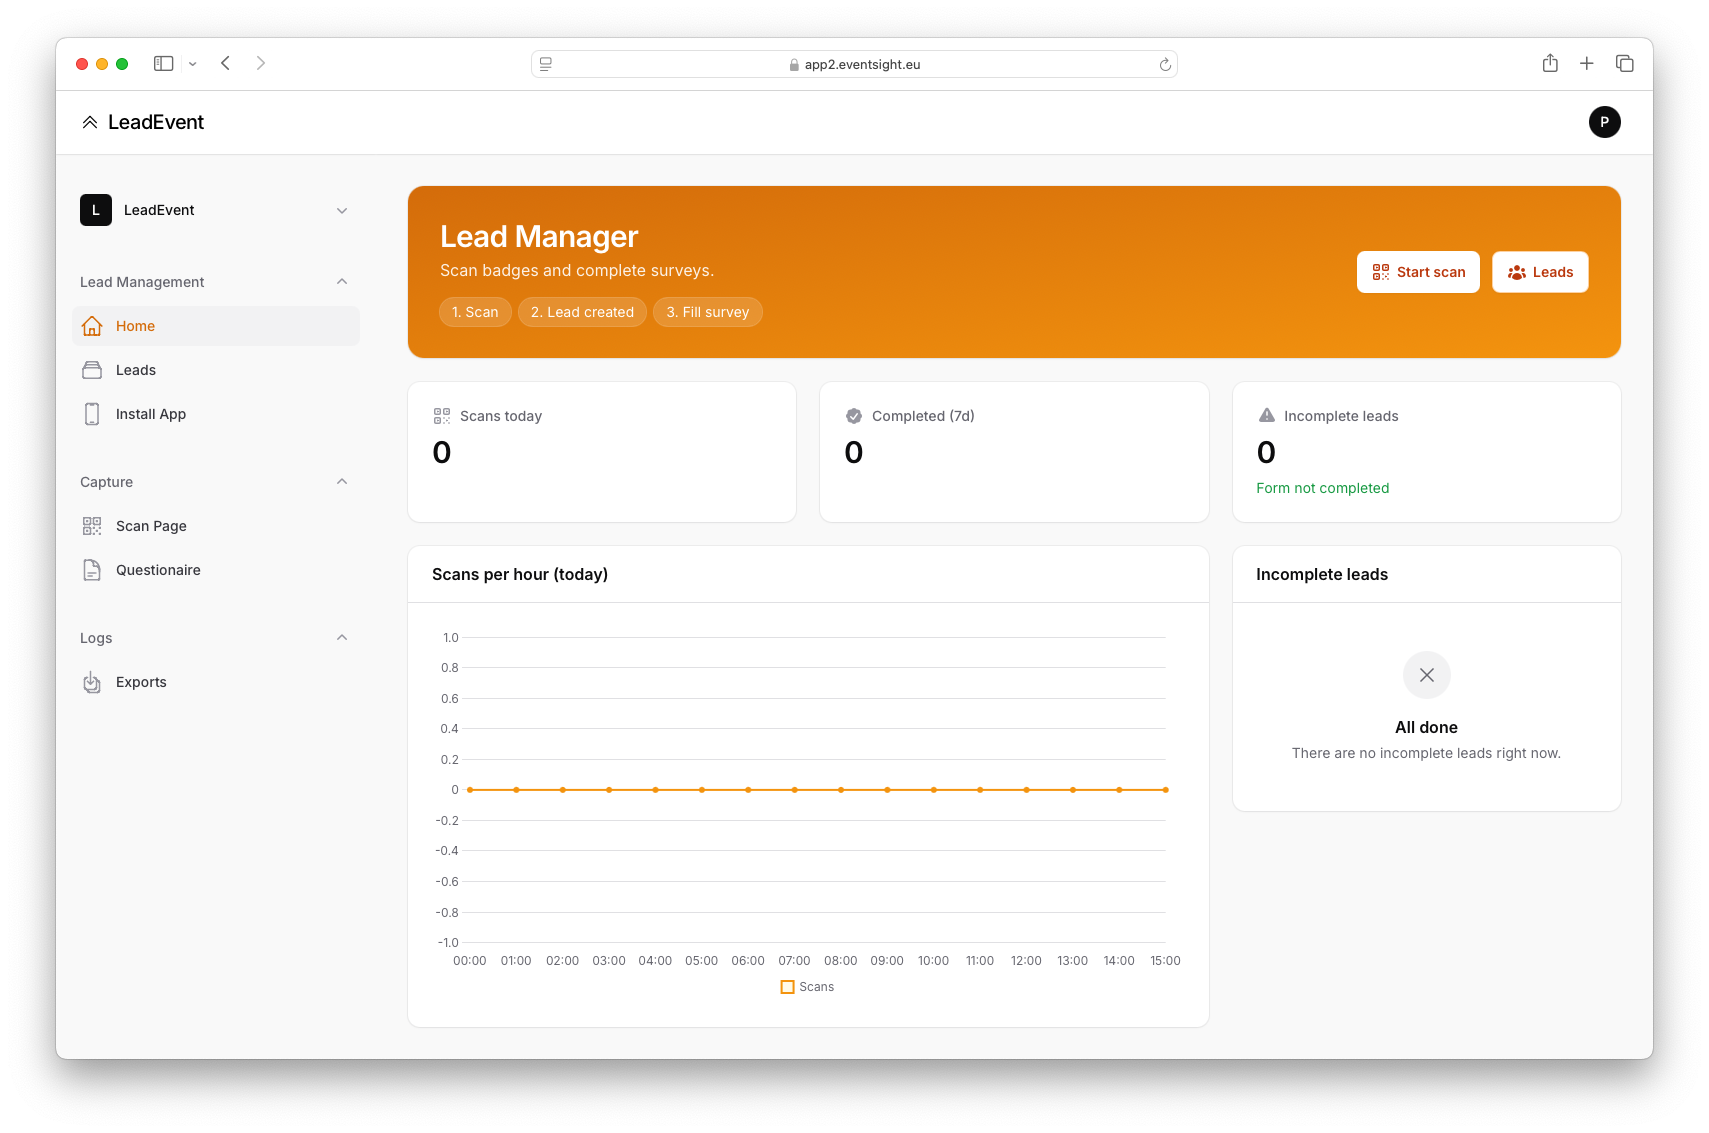
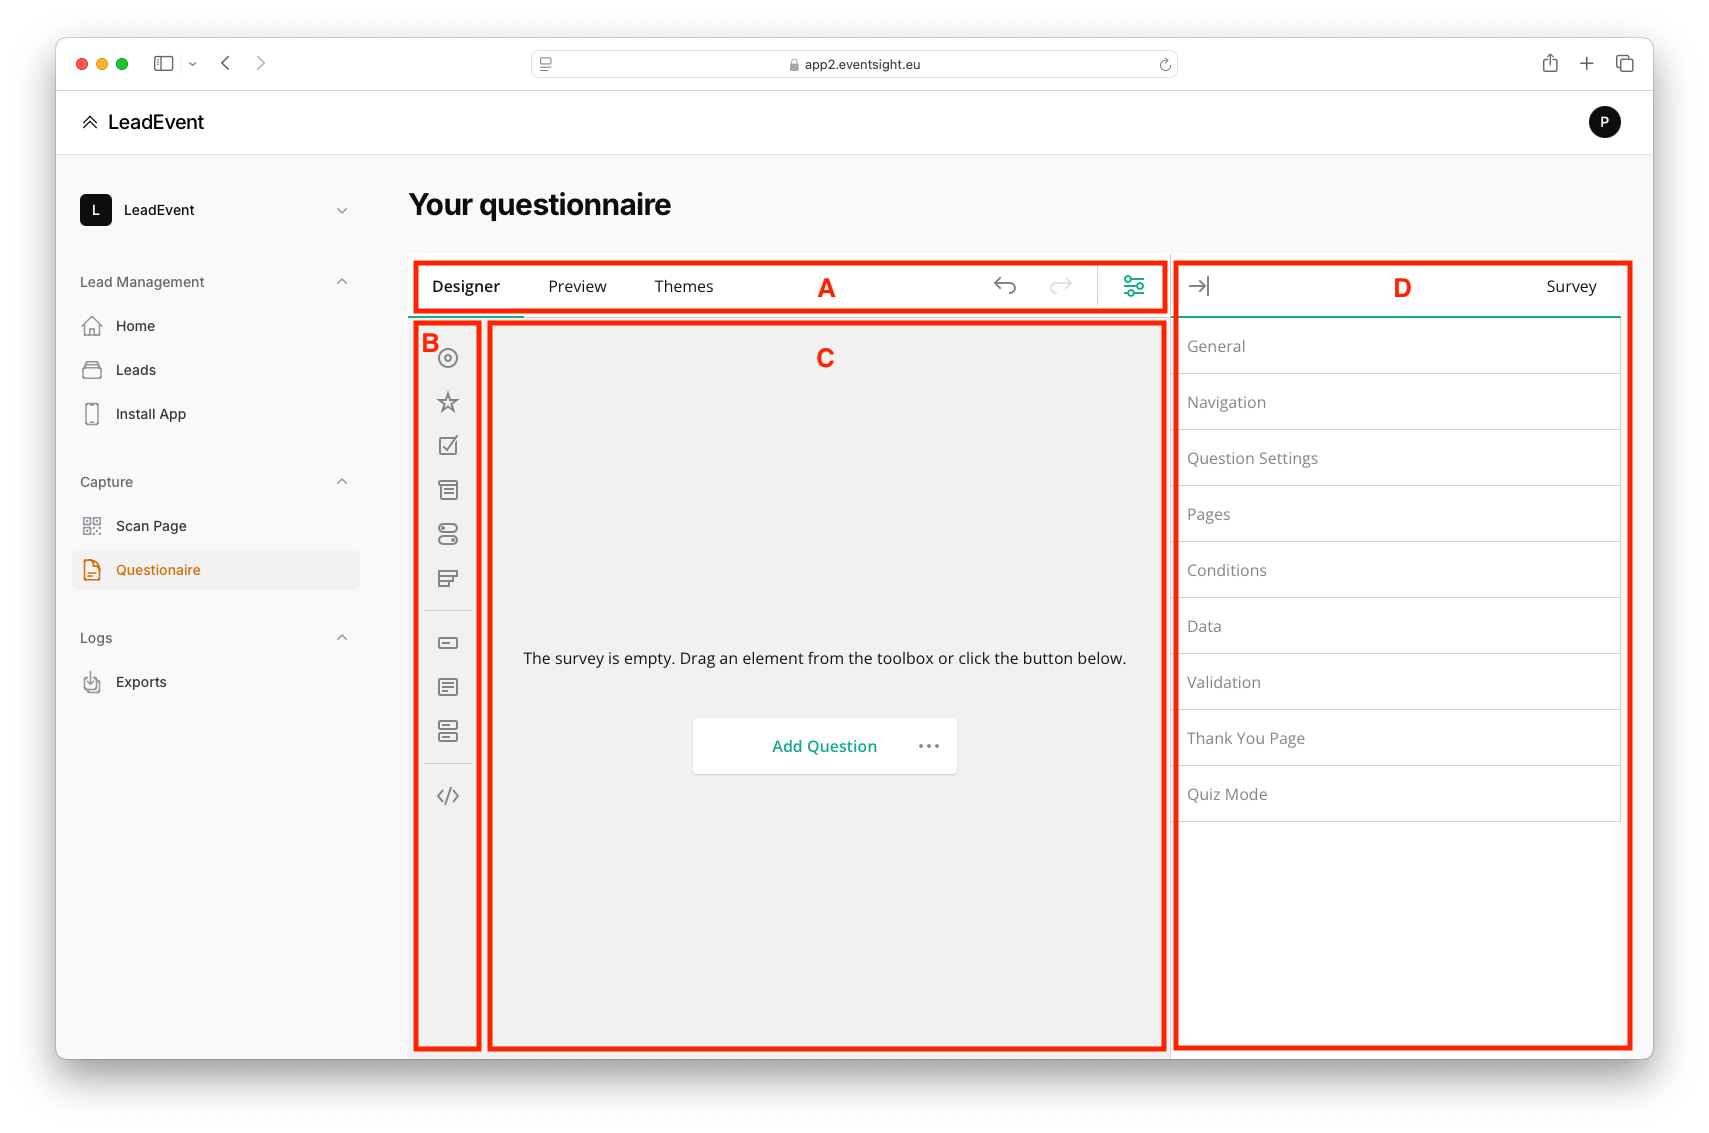
In the back office, the screen layout is divided with the navigation on the left and content on the right.
These are the other navigation options:
- Form editor
Configure the form your team members will see after scanning a visitor's QR code. - Leads
View an overview of your leads, along with an export button to download them. - Scanner
Scan a QR code or manually enter the barcode to add a lead. - Integrations
Link the Lead Manager to your CRM or other tools from this page.
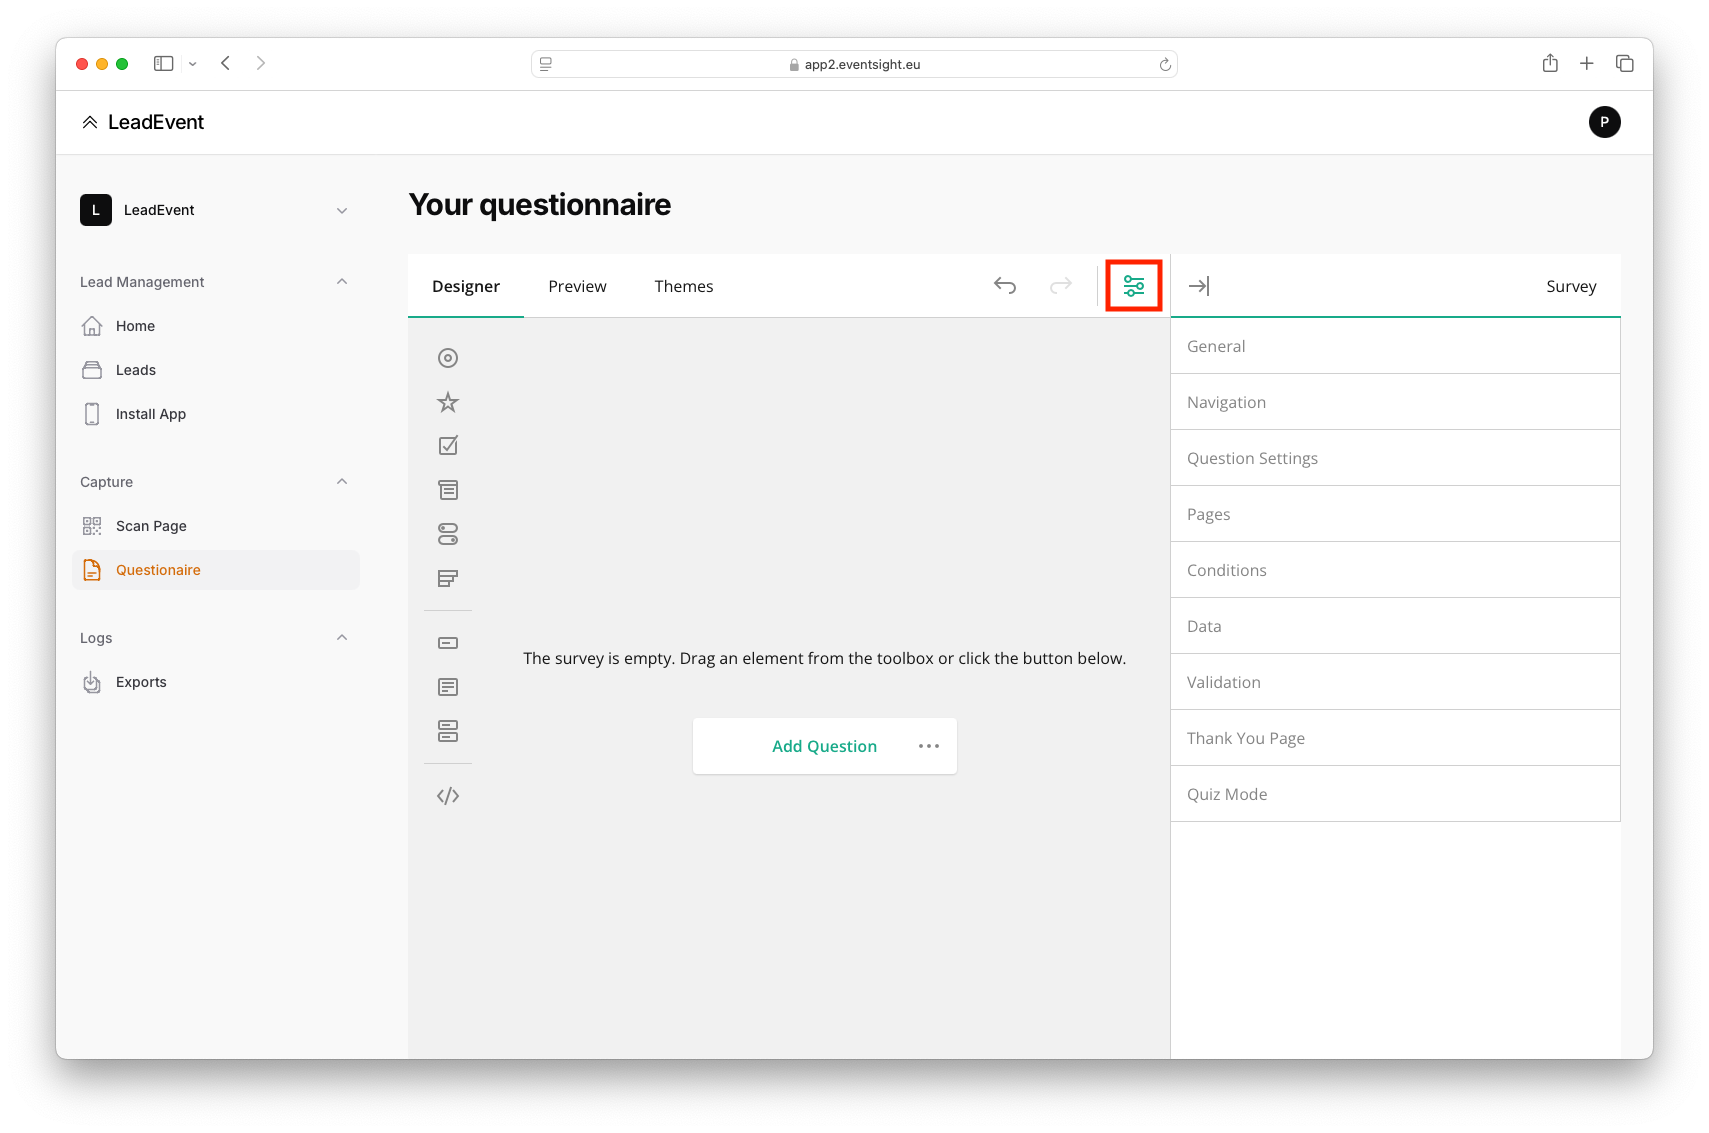
4. Working with the Form Editor
To work efficiently with the Form Editor, it’s important to understand how the screen is divided into different zones.
Any changes made to the form are saved automatically and are instantly visible in the final result.
- Navigation
Different tabs with various options. You’ll spend most of your time in the "Designer" tab. - Input Fields Panel
All possible field types that can be used to fully personalize your form. - Form Preview
Here you can select, add, remove, and reorder fields. - Sidebar with Options
Depending on the selected element, different options will appear. By default, general form settings are shown. All sidebar options are grouped for ease of use.
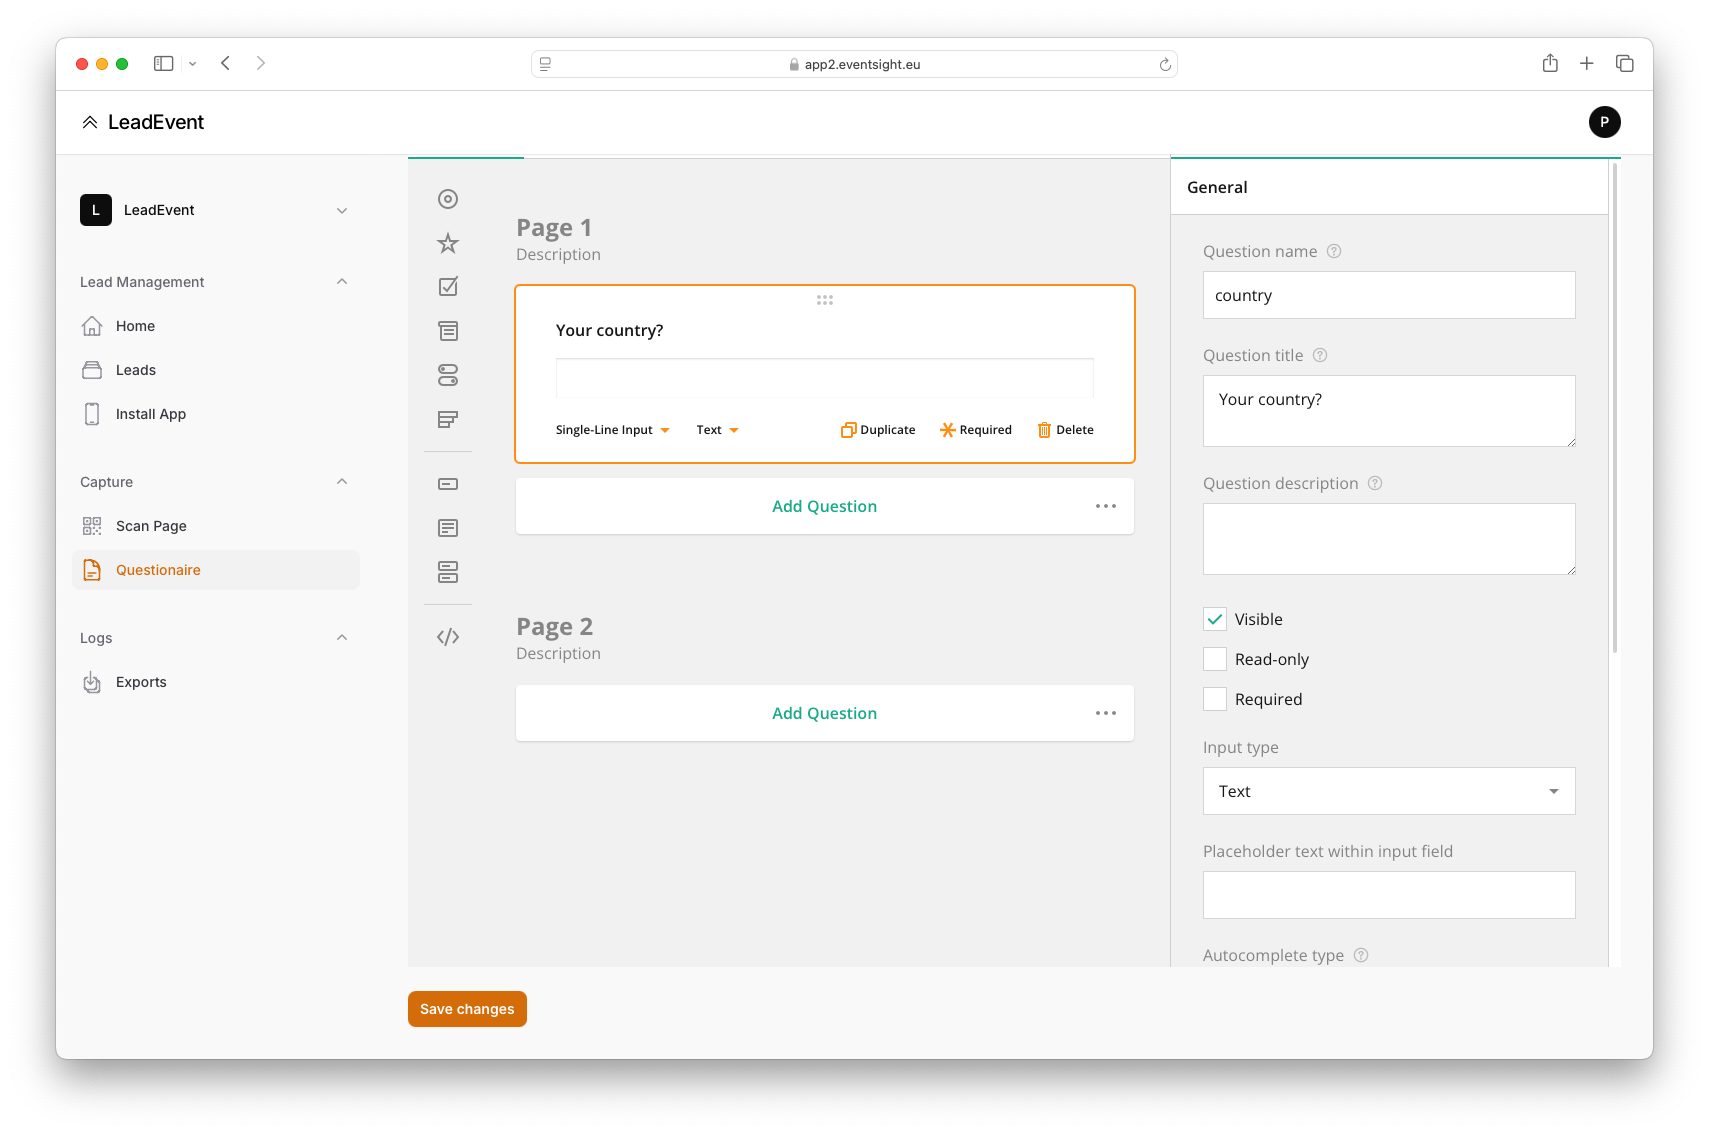
5. Managing Questions (selecting, adding, removing, editing)
5.1 Adding a question to the form:
- Click once on a question type in the left column.
- Drag a question type from the left column into the middle preview.
- Click the "Add Question" button.
5.2 Selecting a question:
Click the question you want to select. It will be highlighted with a thicker orange border. Once selected, the sidebar content will change to show settings specific to that question.
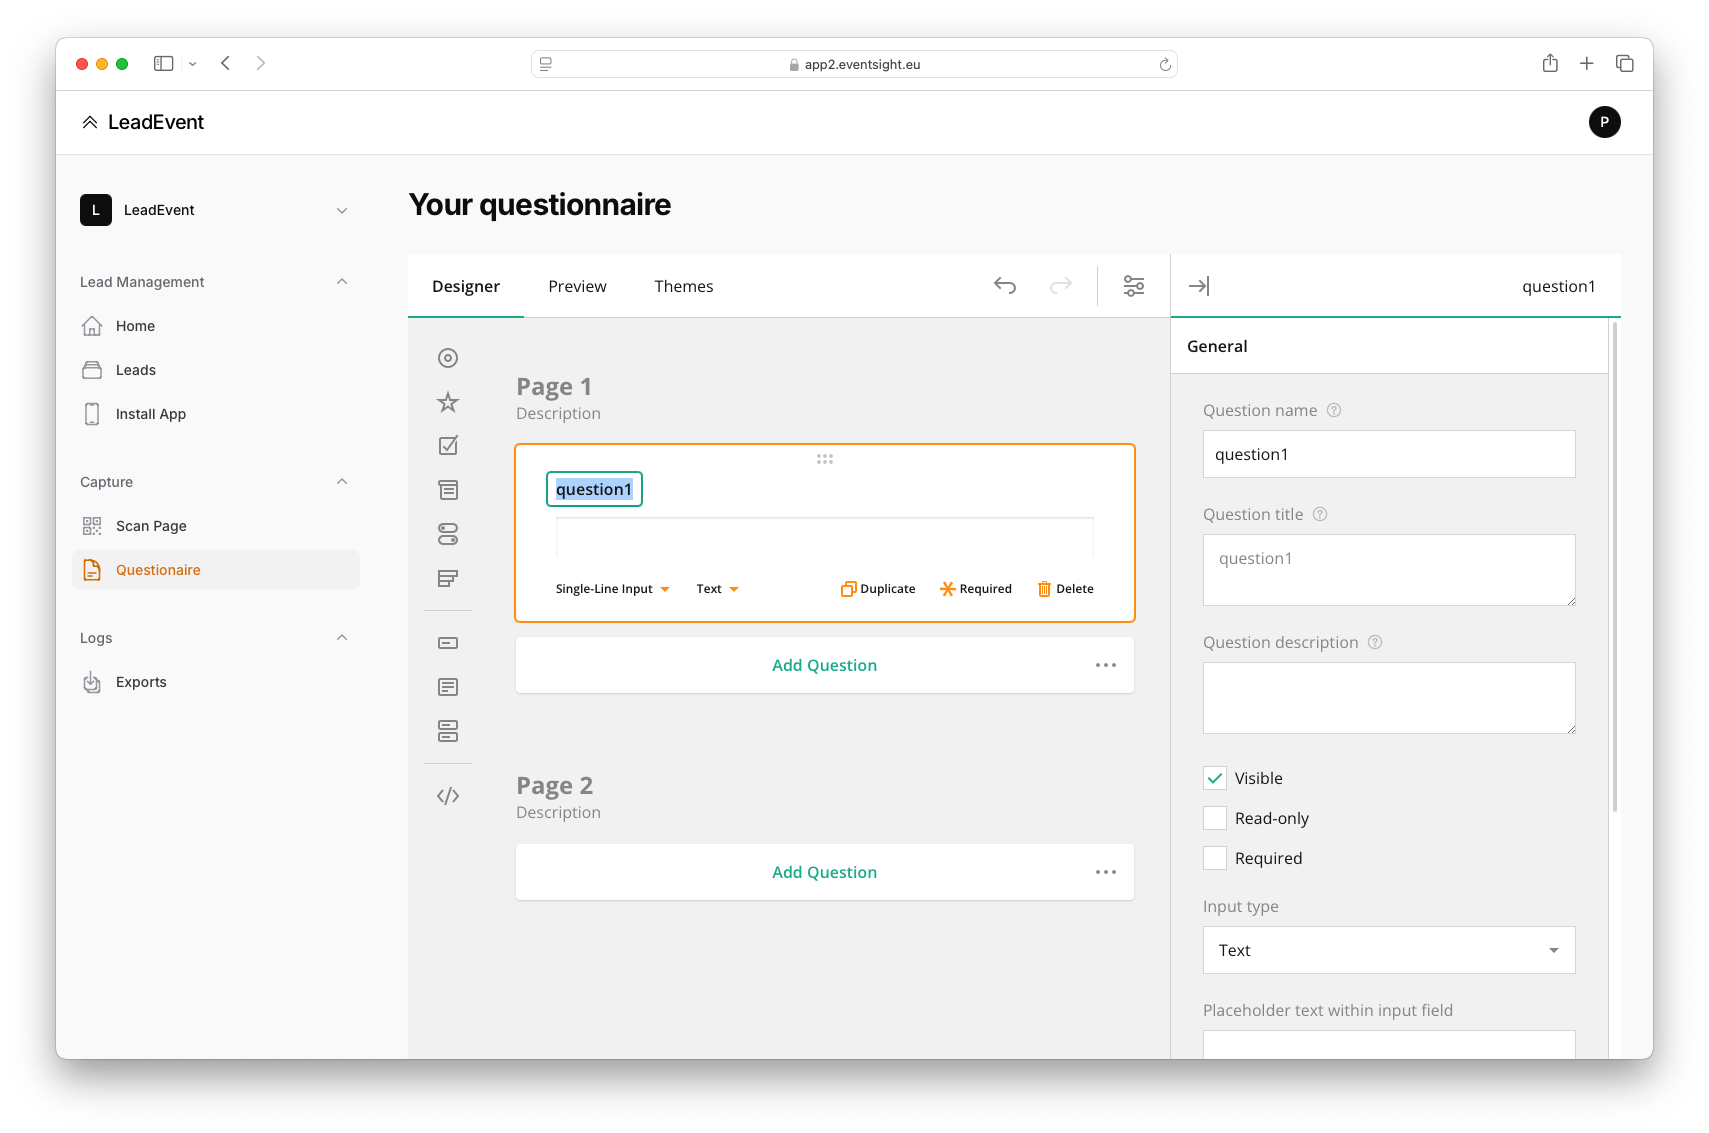 In this example, "question2" is selected, and the sidebar shows only the options relevant to it.
5.3 Changing the question type:
In the question box, click the dropdown in the bottom-left corner to change the question type.

5.4 Deleting a question:
Simply click the "Delete" button visible next to the question.
6. Configuring a Question
This is done using the options in the sidebar. First, select the question by clicking it in the middle preview area. Since each question type allows for different options, we’ll first go over the general settings that apply to all question types.
The “Name” is the most important. This defines under which column the answer will be saved in the export file. Every “Name” must be unique—no two questions (and thus no two export columns) can share the same name.
The “Title” is how the question will appear to users filling out the form. This is optional and can be used if you don’t want to show the internal “Name” as the visible label.
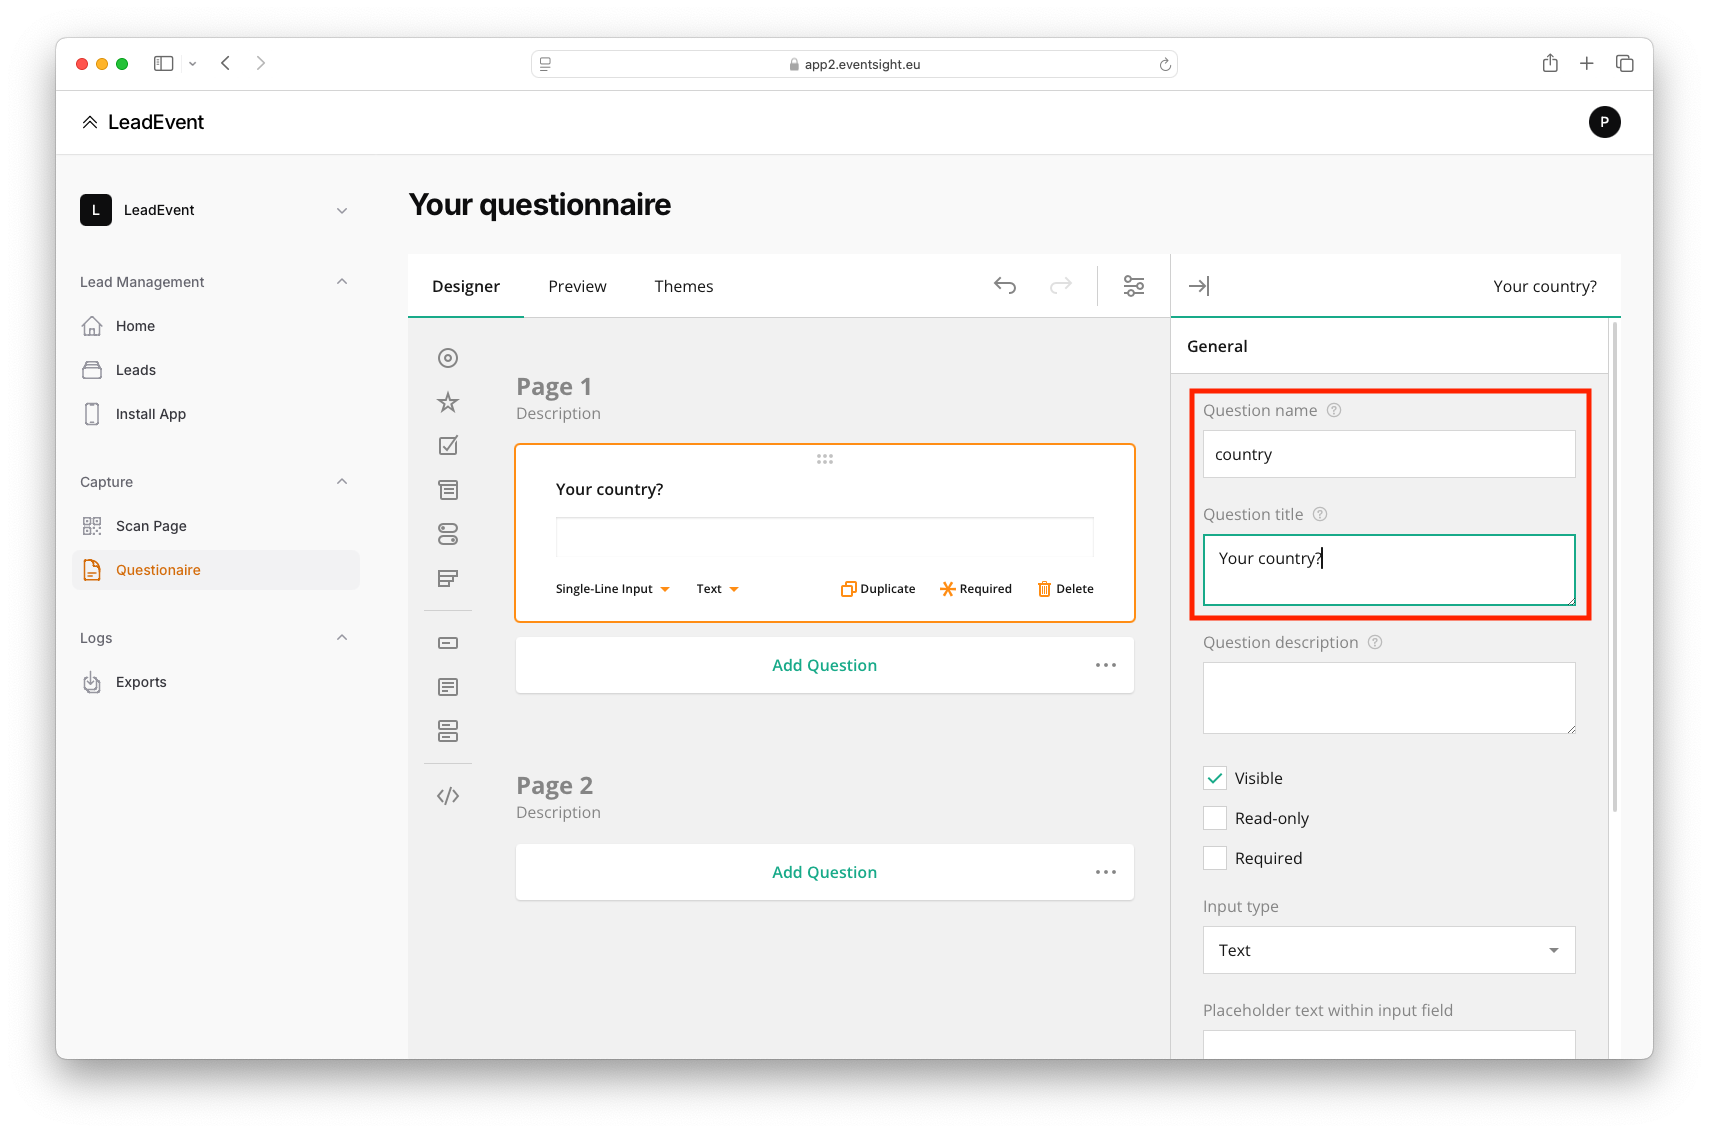
Example: If you want to create a question to collect a mobile number: Name: gsm & Title: Your mobile number
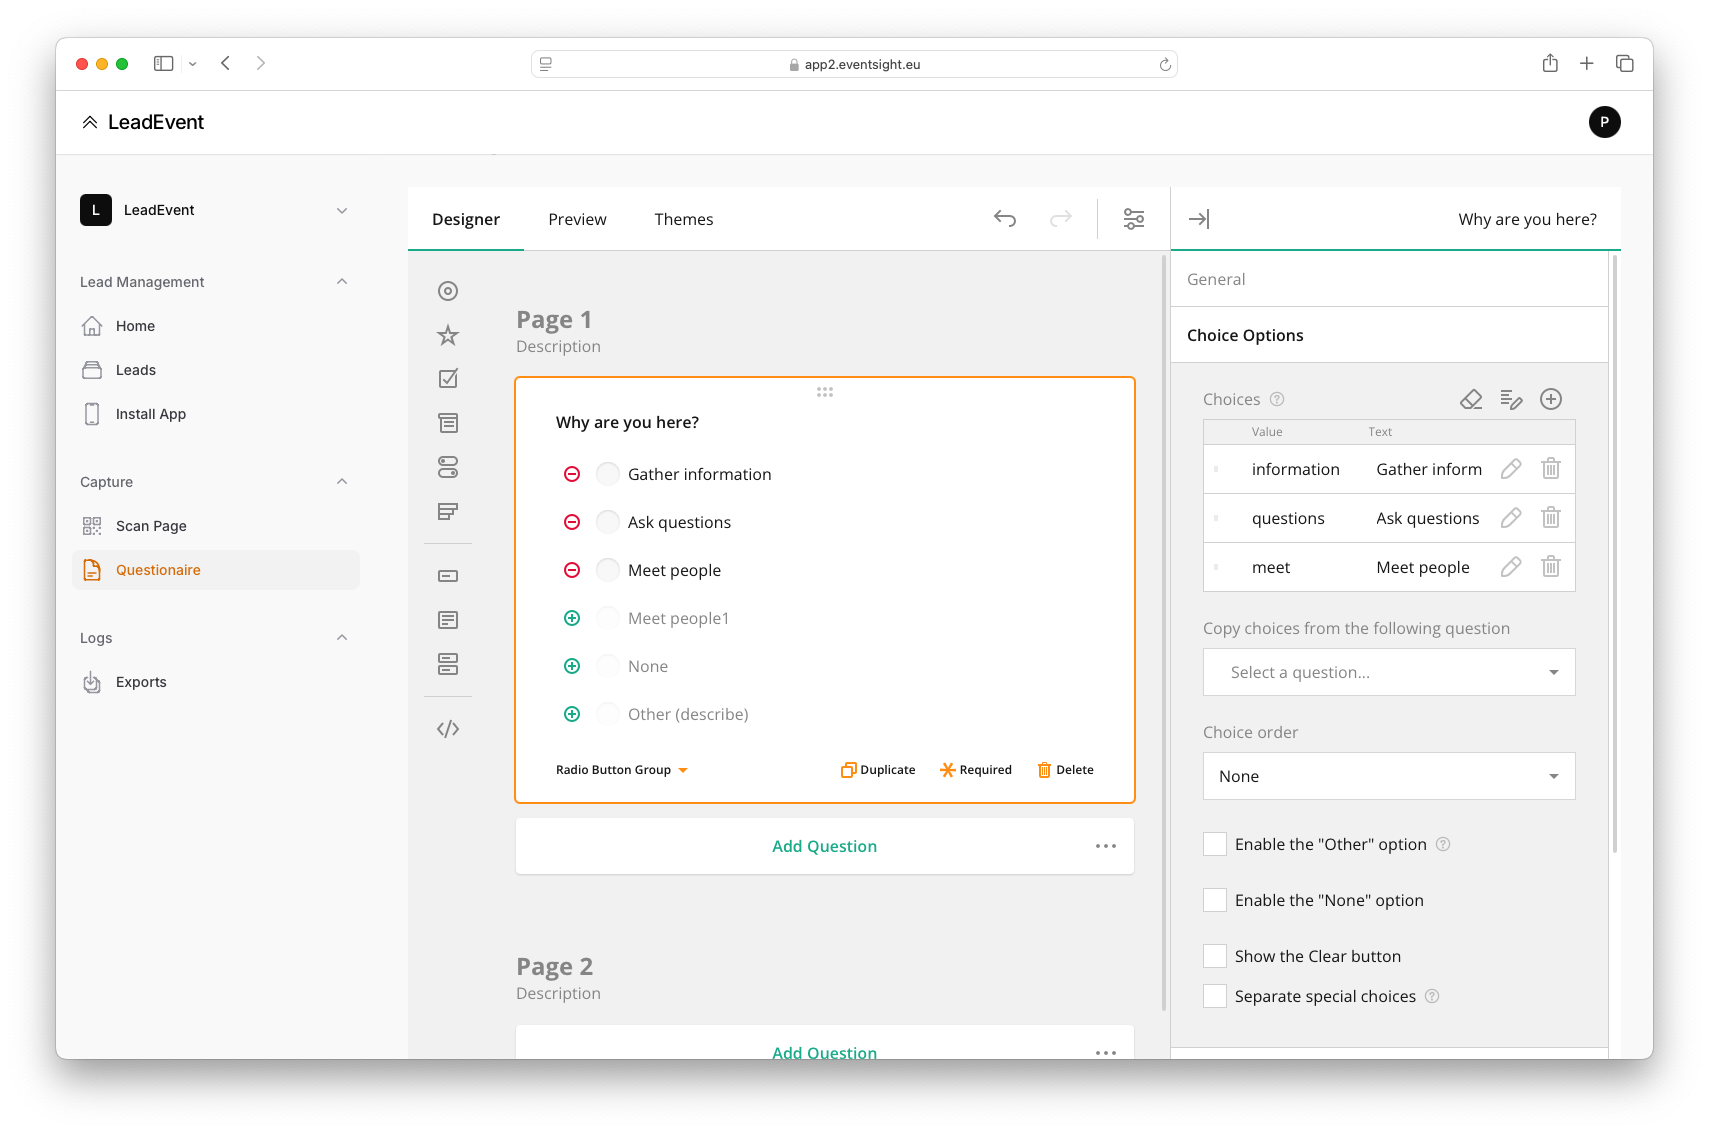
6.2 Configuring predefined answer options
For questions with predefined answers, such as radio buttons or checkboxes, select the question and go to the “Choices” section in the sidebar.
Here too, you can differentiate between how an answer is saved and how it’s displayed. In each line in the Choices list, the first value is the saved answer, and the second value is how it will be shown.
7. Activating General Form Options
To re-open and edit the general form settings, click the button located at the very top of the screen, to the left of the sidebar.
8. Save your work
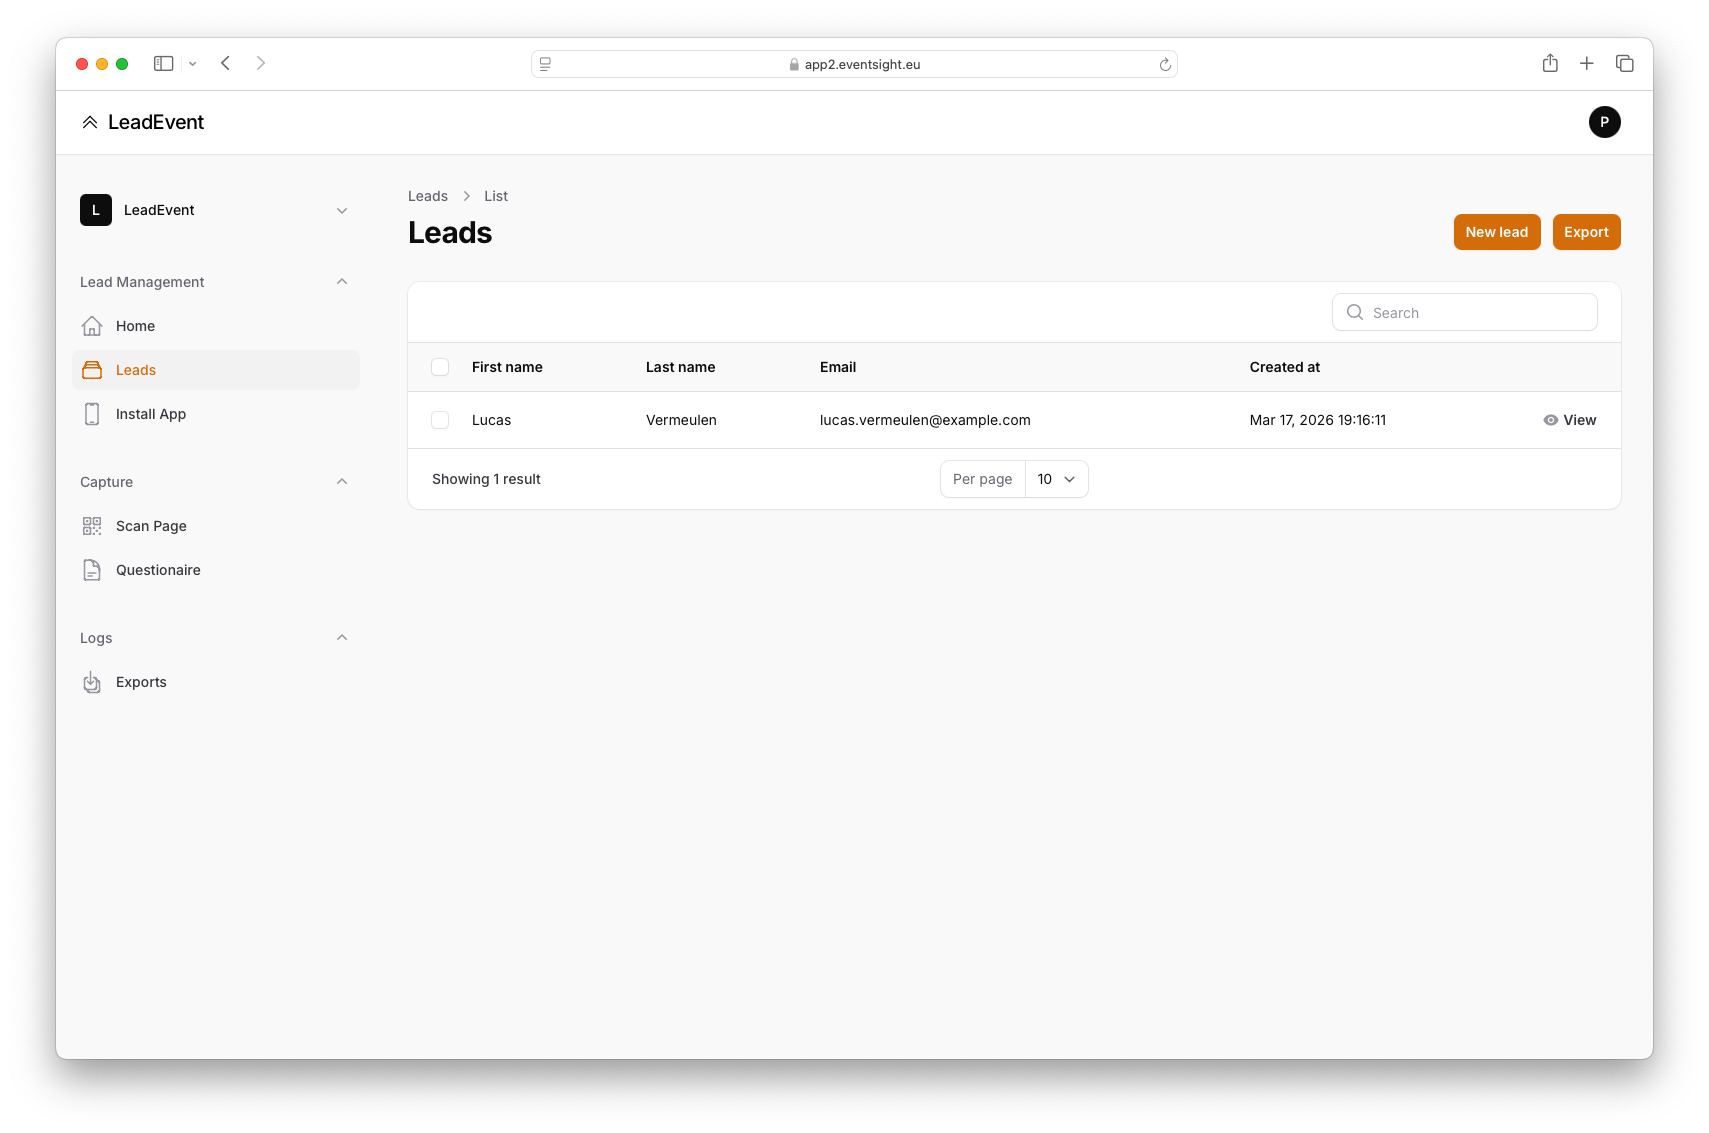
9. The Leads Screen
The Leads screen is very straightforward and always shows an overview of all scanned QR codes—even those where the follow-up form was only partially completed.
In the top right corner of the overview, you will find the button to download all leads.
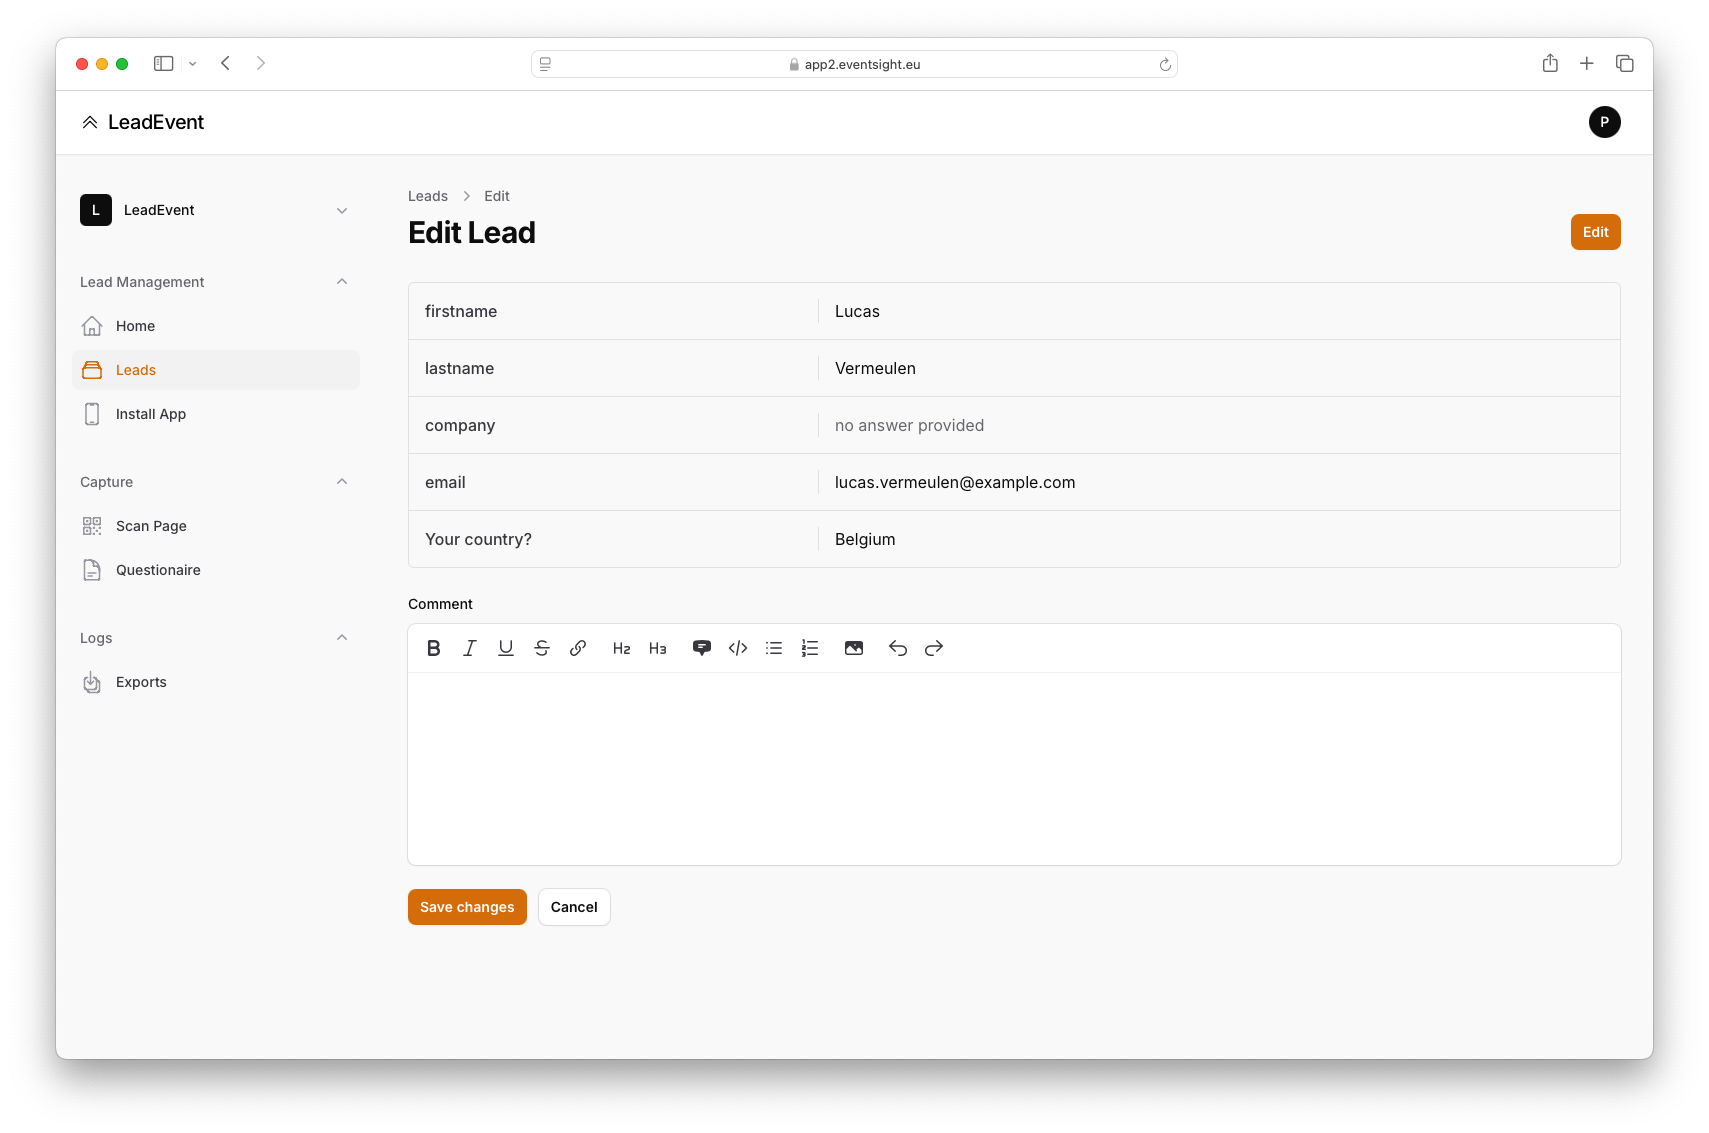
10. The Detail Screen
In the Detail screen, you can view, edit, or download each lead’s data individually.
Form data will always appear below the default information of the lead.